Substance Painter Notes
April 12, 2023October 20, 2021- Using Substance 3D Painter with Cinema4d
Today we’ll be checking out Adobe (formerly Allegorithmic’s) Substance 3D Painter. It’s a little like the built-in 3d Paint feature in Cinema4D, but with lots and lots of extra features, including procedurally generated textures, painting and stamping tools, filters and effects, lots of presets, and a giant archive of user made and prefab substances.
After this class students should be able to:
- Install a free educational copy of all of the Substance 3d applications
- Export a model from a 3d application to add textures to in Substance Painter
- Export texture maps from Substance Painter to use in Unity or C4D
Unfortunately Substance apps aren’t currently installed on the lab computers, so let’s try to get Painter installed on your personal machines, before class if possible. Substance painter is on the lab computers now!
Installing Substance Painter
Substance and Student Licenses
This used to be complicated, but now it should be simple- download “Adobe Substance 3D Painter” with your student Adobe Creative Cloud account. For more info check here.
Substance painter workflow with C4D
This is the “hard way” (the way I’ve been doing it), there is also now a $25 plugin that will automate this process and live link between substance and c4d, I haven’t used it yet, but looks pretty simple!
Also, the following method is for the standard renderer, but as we all know, the arnold renderer looks a lot better. I found this tutorial on how to export substance painter textures to an arnold material in C4d.
Exporting a model from C4D to paint in substance painter
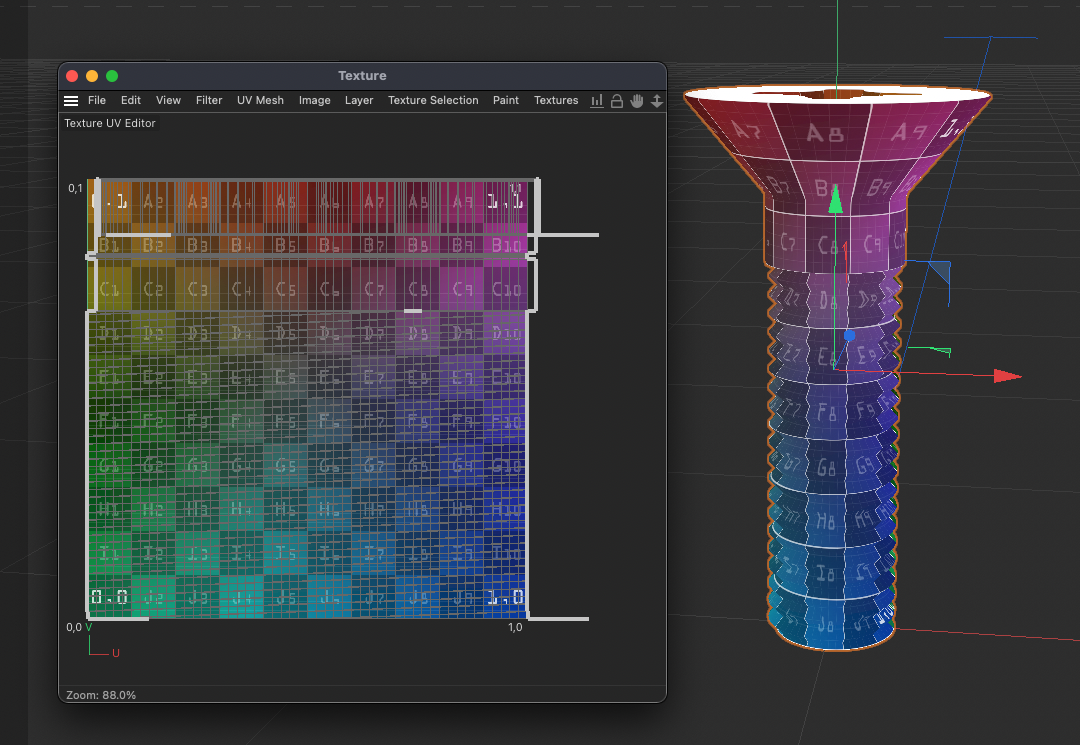
Sometimes UV unwrapping is hard, I made a fbx with clean UV’s (the one named compooter.fbx) that we can use in class if needed
- Use the UV mapping lesson to ensure that your model has a proper uv map without overlapping textures.
- Create a default material and add it to the model
- File > Export > FBX Turn off Bake Materials in the Export Settings
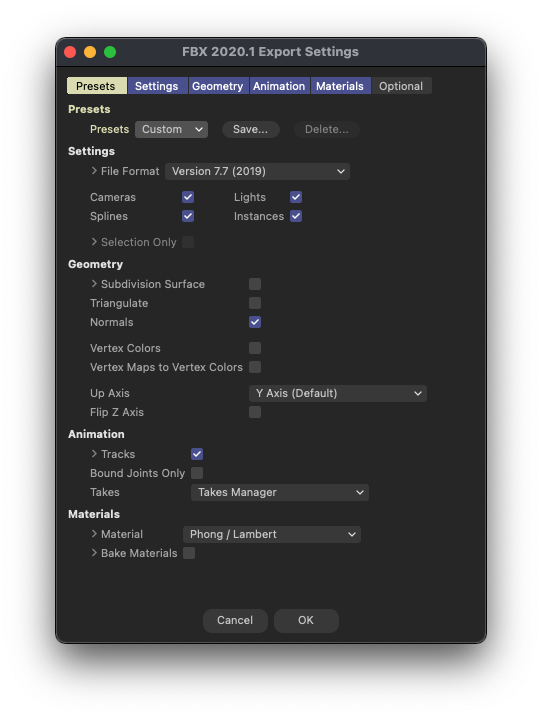
Import and paint in Substance Painter
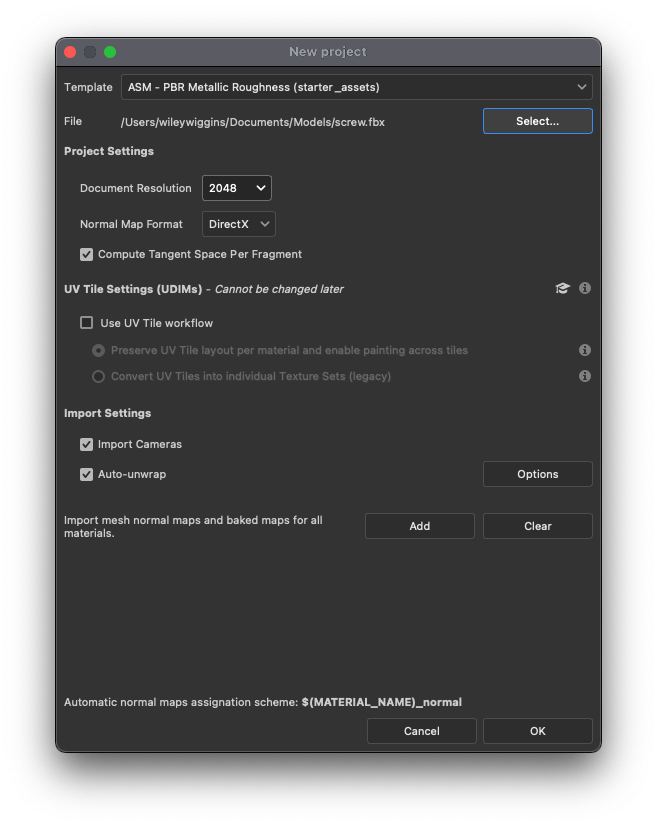
- Drop your fbx file into the empty window in Substance painter, OR select File > New, and in the New Project window click the Select… button and choose your fbx. Here you can also set the document resolution. For Animating in Cinema4d 4096 is ok, but for games in unity use 1024 or 2048 for an object that the player will look at closely. leave Use UV Tile workflow UNCHECKED. Leave Template set to PBR Metallic Roughness. You can leave auto-unwrap on even if you already organized your uv, since it will only generate missing data by default.
- in TEXTURE SET SETTINGS click Bake Mesh Maps, in the settings make the resolution the same as the texture resolution of the document.
- After this completes, check out the model, does it have weird shadows on it that look like the texture is drawn incorrectly? If so, you probably have overlapping uv’s or multiple uv tags for a single material. Go back into C4D, remove extra uv tags and try another projection in the the UV manager/ check the texture view to make sure meshes aren’t overlapping one another. You can resize/rotate/move meshes as you see fit. Make sure they all fit on the grid square! & turn fit to selection on > object system in the projection tab of the UV mapping window. Now re-export your fbx and import it into a new Substance painter document as before. Bake again and check it out.
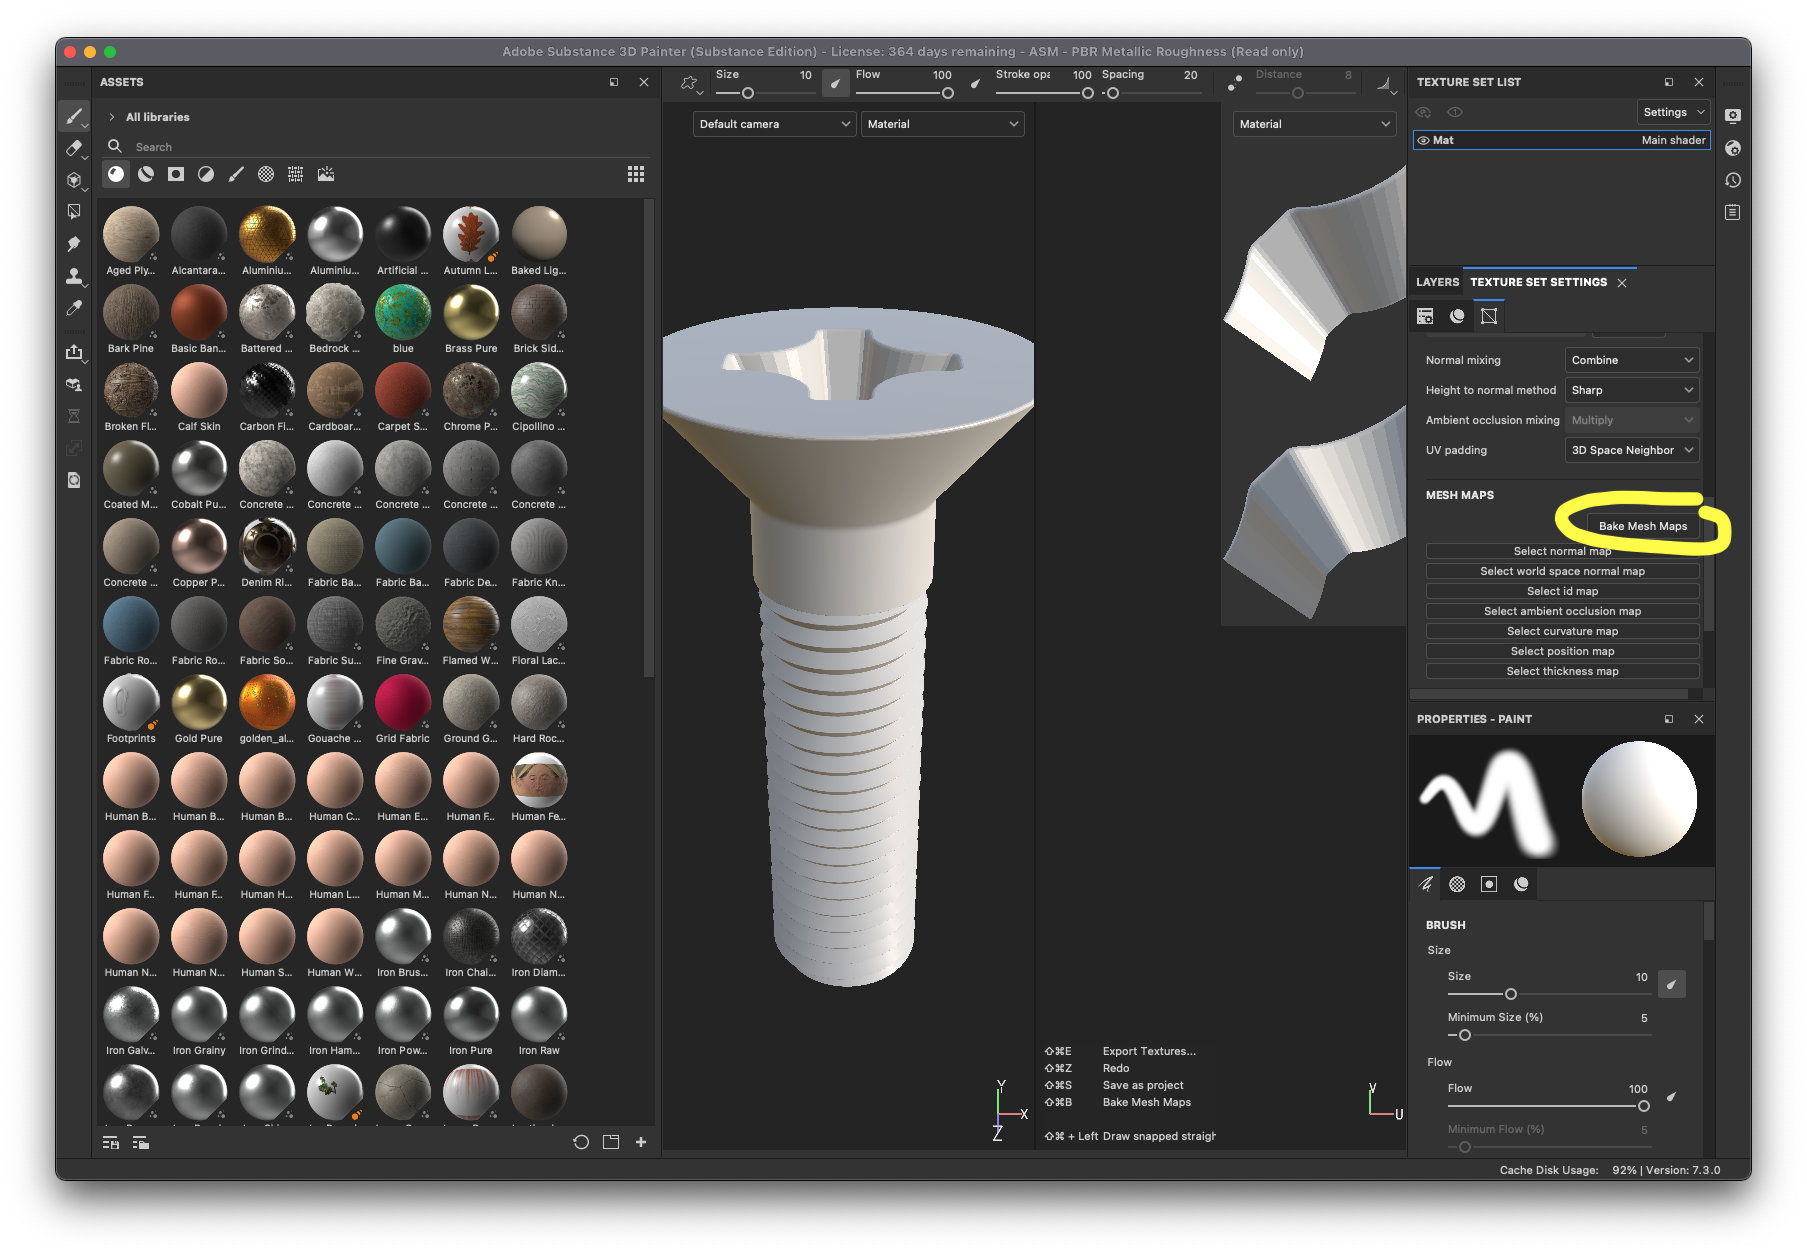
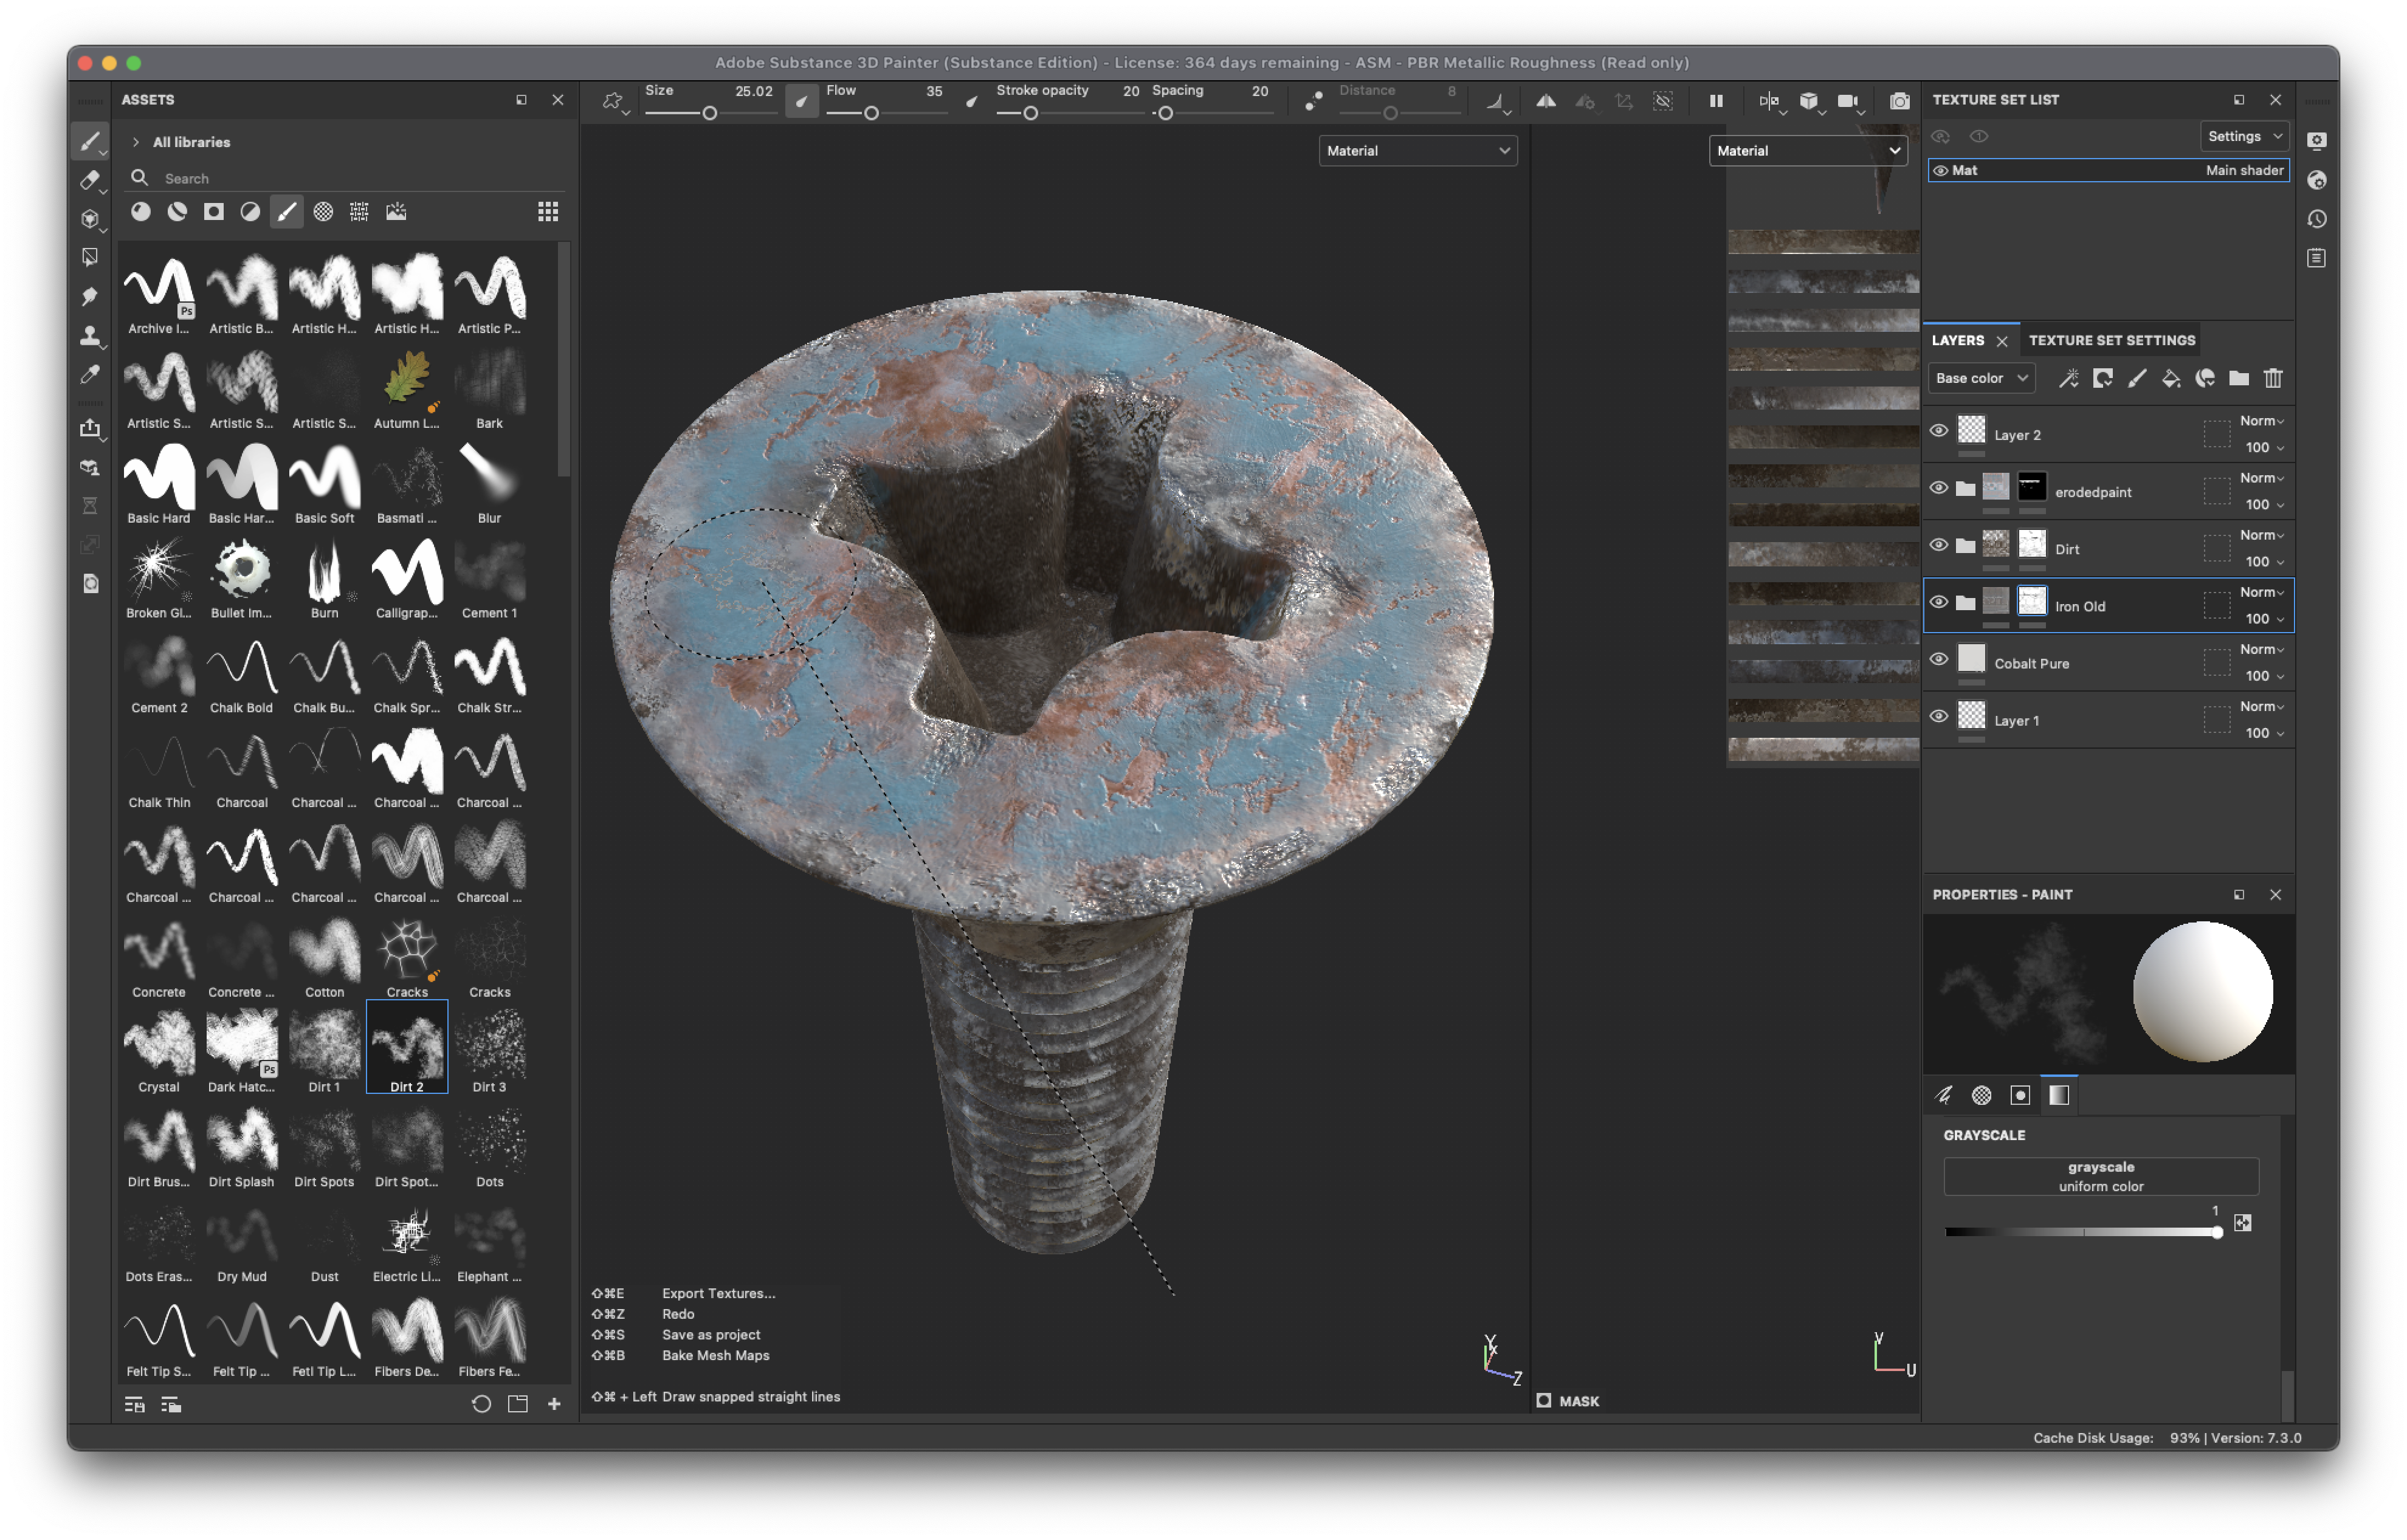
- If your model in substance painter is shaded normally without any weird dark or light shapes on its surface you are ready to paint. A fun first thing to try is to click on the second icon in the top left assets area: Smart Materials. These are all parametric texture presets that will work with your obejct baking and geometry to look pretty cool immediately.
- I will demo a more in-depth painting process in class! Painter is a little like photshop but you have access to procedural brushes and textures, and can paint naturally on roughness, metalness, and height channels and see the effects immediately on the model.
Exporting Textures from Substance Painter for C4D
For the standard renderer -
- Export Textures > pick a directory in Output Directory, pick PBR Specular Glossiness (converted from Metallic Roughness) template, click Export
For Arnold renderer -
- For now, check out this video. I’ll add step-by-step instructions here soon!
Exporting Textures for a website using Modelviewer.js
Do you want to embed a 3d model into a web page? Modelviewer is a javascript library that will let you do it, here’s how to prepare model files for it in Substance Painter-
- Export Textures > pick a directory in Output Directory, pick glTF template, click Export
- modelviewer will use the glb file from this export. If you would like to have the model be viewable on iOS (and placeable in AR using a camera) get the Reality Converter mac app, drop the glb file into it and File > Export a usdz file. Modelviewer will use both the usdz file and glb file, put them on your webserver and add the paths to these files into the modelviewer embed code.
- you can make your embed code with this webtool
- one limitation of model viewer- people need to make sure they are loading the page with https://, not http:// to see the models.
Importing Textures into C4D
- Back in Cinema4d, double click the material tag to edit it.
- check the Bump and Normal checkboxes on the right of the material editor.
- Click Color, click the … button next to Texture, navigate to your exports and pick the Diffuse file. Click Yes to import the file.
- Click on the reflectance tab, click layers subtab, click the Specular item below and then click the remove button
- click the Add button and add a GGX layer.
- click the reflectance tab, scroll down and click the arrow next to Rougness in Layer 1.
- click the down arrow next to Texture under Roughness and pick Colorizer
- double click on the little black square in the new colorizer section, then flip the gradient by the black gradient stop over to the other side of the gradient slider
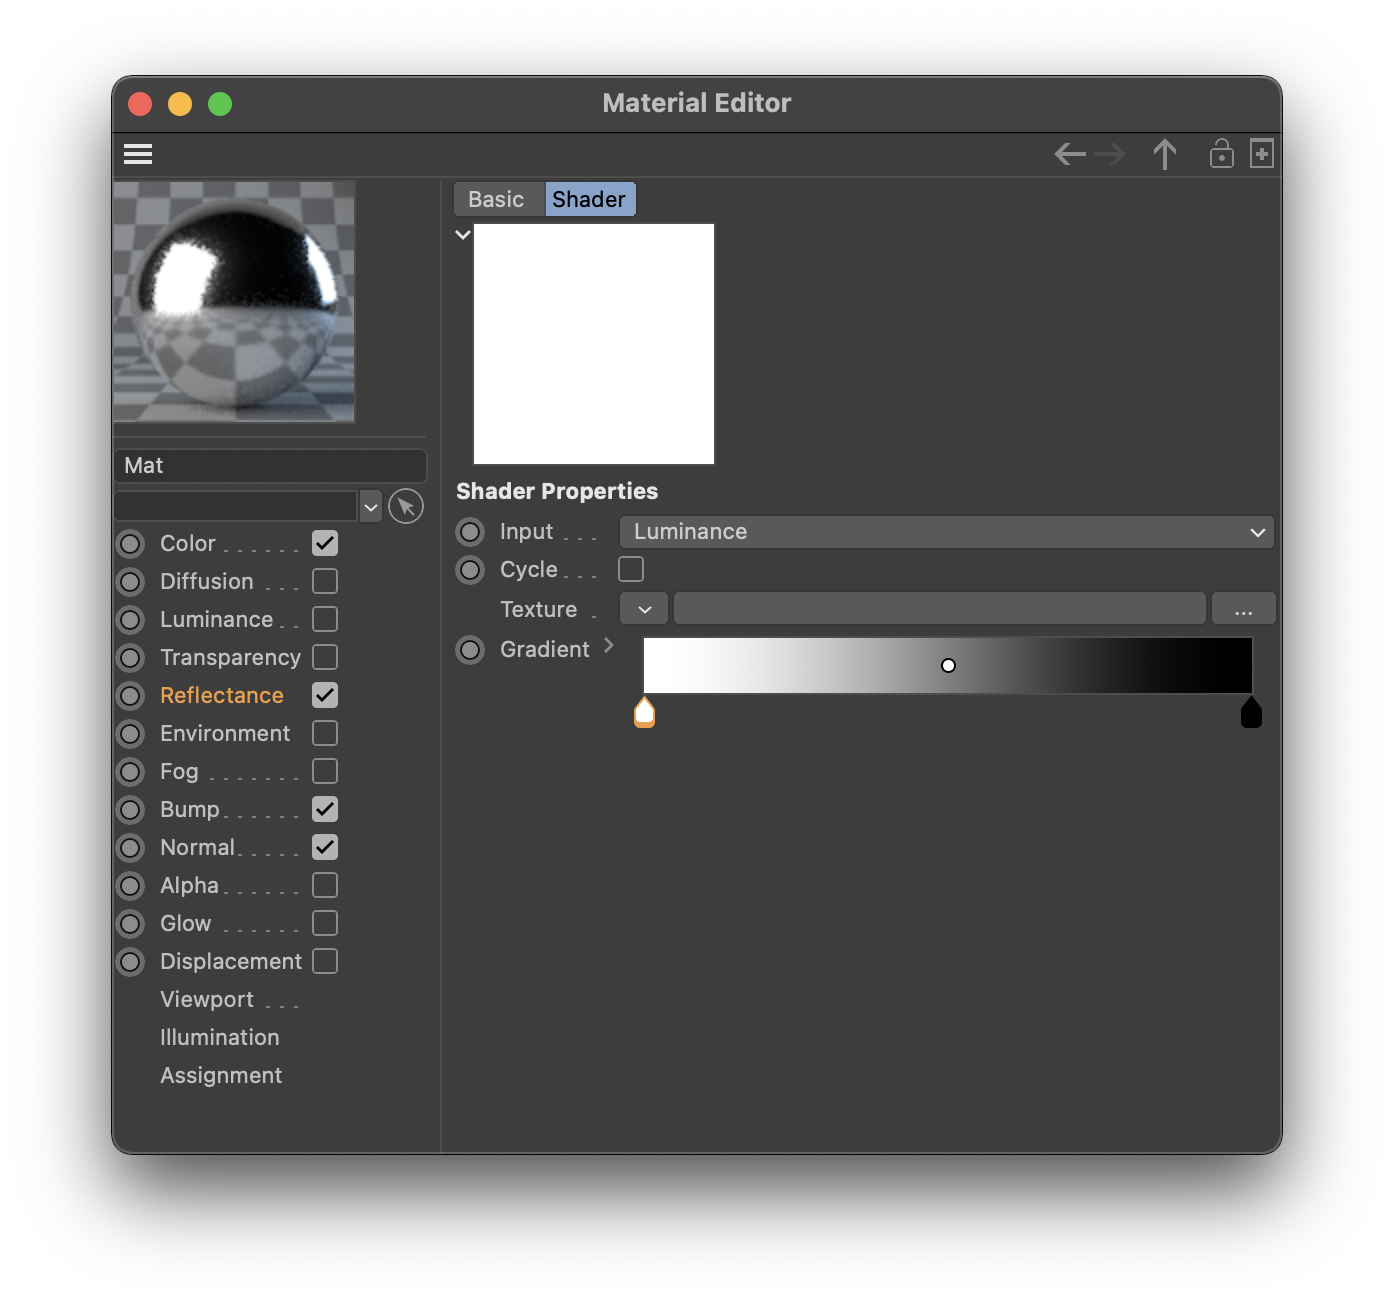
- above the gradient, click … next to texture and add your exported Glossiness file
- go back to the main reflectance settings by clicking reflectance on the right of the editor
- set the roughness slider to 50%
- scroll down to the layer color section and click … next to texture and add your exported Specular file
- click on the Bump section and add your height texture
- click on the Normal section and add your normal texture
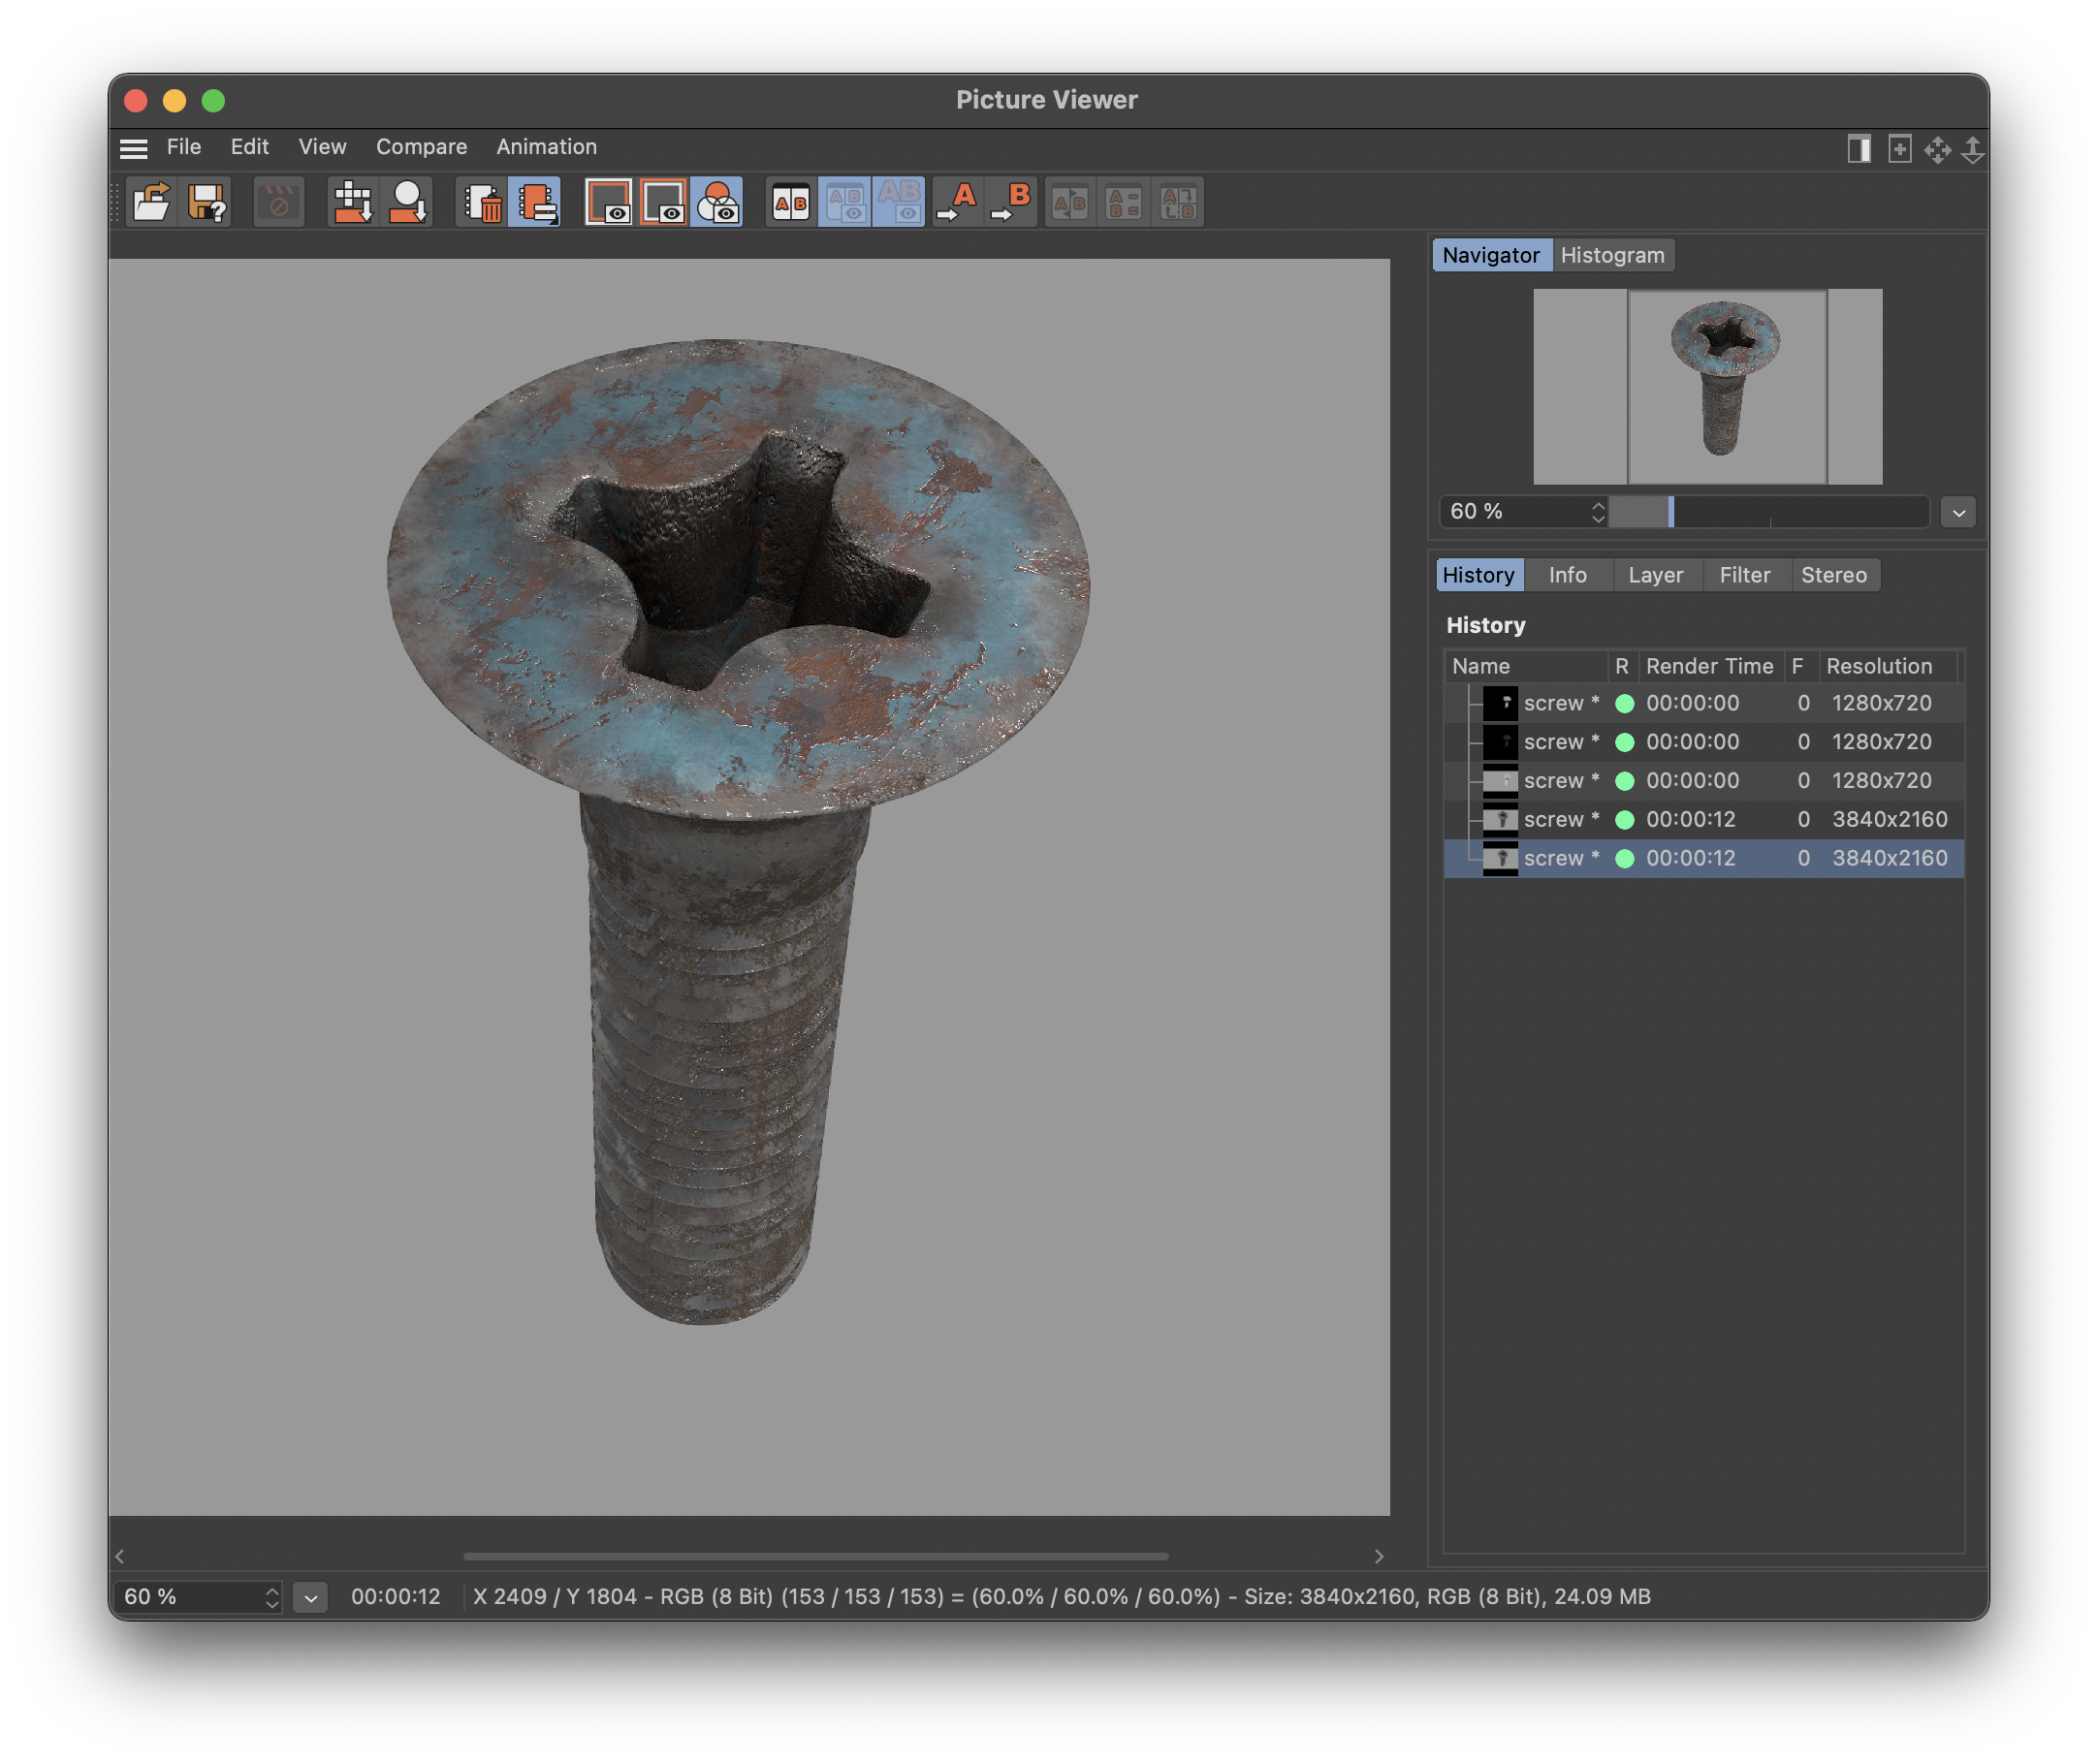
- add a sky, tweak your render settings and render!
Importing Textures into Unity
- When exporting from Substance painter, pick the template for the unity render pipeline your project is using, (for instance the universal render pipeline). Here’s a series of videos about general Substance to Unity workflow.
Downloads:
- screw.fbx, 2
- compooter.fbx, 2